P&P Workflow: #5
 by Jason D. Moore
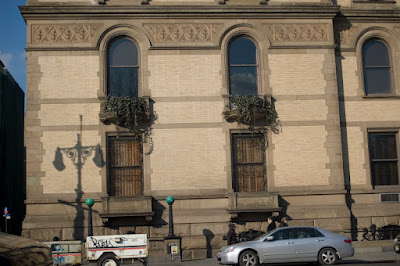
Before: 

Taken on the corner of 72nd Street & Central Park West, NYC 1/30/2007, 11:08 AM
Taken with available light, no flash.
Taken with available light, no flash.
- Nikon D50
Auto Exposure Mode
18.0-50.00 f/3.5-5.6 lens
1/1000 at f/5.3
ISO 200
Focal Length 40mm
RAW
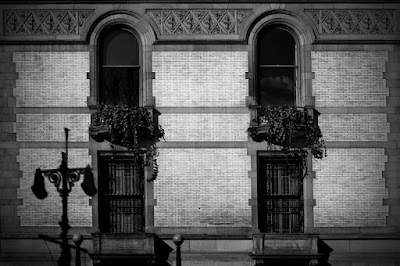
In Adobe Camera Raw 4.0:
- Basic:
White Balance: As Shot
Temp: 5100
Tint: -11
Exposure: +0.87
Recovery: 100
Fill Light: 0
Blacks: 20
Brightness: +50
Contrast: +25 - HSL/Grayscale:
Convert to Grayscale
Reds: +14
Oranges: -2
Yellows: -11
Greens: -19
Aquas: -16
Blues: +13
Purples: +24
Magentas: +21 - Detail:Sharpening: 25
In Photoshop CS3 Beta:
- Duplicate the background layer.
- Convert the duplicate layer for Smart Filters.
- Apply a Lens Correction filter:
Vertical Perspective: -8
Horizontal Perspective: +11
Angle: 358.76
Scale: 108 - Apply a Curves Adjustment Layer to the bricks with points at Input/Output 167/125 and 205/219. This brings out the various shades in the brick to add character.
- Apply a Curves Adjustment Layer to the stone work with points at Input/Output 37/0 to add contrast to the stone.
- Stamp visible and apply a Vignette with an amount of -75.
- Apply a Curves Adjustment Layer to the whole image with points at Input/Output 27/21 and 189/195 to increase the overall contrast.
After:

*If you would like to contribute to the P&P Workflow, please email Jason.


