
P&P Workflow: #7
 by Jason D. Moore
 Before:
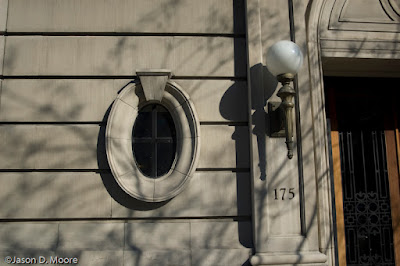
Taken on 72nd Street, NYC 1/30/2007, 11:18 AM. Taken with available light, no flash.
Nikon D50
Auto Exposure Mode
18.0-50.00 f/3.5-5.6 lens
1/1600 at f/4.0
ISO 200
Focal Length 25mm
RAW
In Adobe Photoshop Lightroom 1.0 (Develop Module):
- Basic:
White Balance: As Shot
Temp: 4800
Tint: -13
Exposure: +0.76
Recovery: 100
Fill Light: 28
Blacks: 19 - Tone Curve:
Highlights: 0
Lights: +10
Darks: -9
Shadows: -45 - Split Toning:
Highlights: Hue – 47, Saturation – 35 - Detail:
Sharpening: 100
In Photoshop CS3 Beta:
- Duplicate background layer (on general principles to preserve the original)
- Convert for Smart Filters.
- Apply a little grain by applying a Lens Blur with a Noise amount of 3 with a monochromatic, uniform distribution. (I just like the way lens blur applies the noise.)
- Apply a Lens Correction Filter with the following settings:
-Vignette – Amount: -79, Midpoint: +43
-Transform:
Vertical: -17
Horizontal: +5
Angle: 359.99
Scale: 108 - Add a Curves Adjustment Layer to push the lamp closer to white. Fill the mask with black and, with a soft-edged brush, paint with white over the lamp.
- There were some spots on the window, so I created a new layer and cloned and healed those spots, making sure the “Sample All Layers” box is checked.
After:
*If you would like to contribute to the P&P Workflow, please email Jason.


