P&P Workflow: #6
 by Jason D. Moore
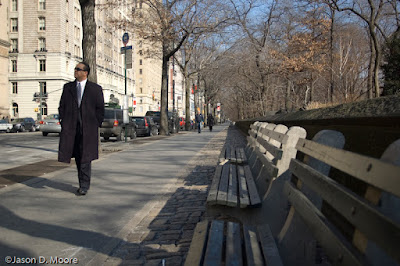
Before:

Taken near the corner of 72nd Street & Central Park West, NYC 1/30/2007, 11:08 AM. Taken with available light, no flash.
Nikon D50
Auto Exposure Mode
18.0-50.00 f/3.5-5.6 lens
1/640 at f/4.2
ISO 200
Focal Length 26mm
RAW
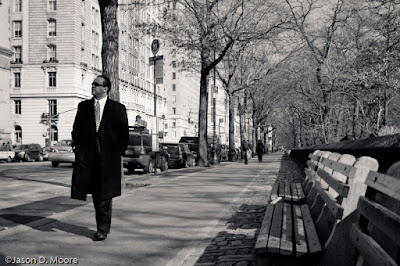
In Adobe Photoshop Lightroom 1.0:
- Cropped to constrain proportions and make sure the right side of the subject was roughly along the left-hand third.
- In Develop Module:
-Basic:
White Balance: As Shot
Temp: 5150
Tint: -12
Exposure: +0.61
Recovery: 100
Fill Light: 0
Blacks: 28
-Tone Curve:
Highlights: +8
Lights: +11
Darks: +4
Shadows: -18
-Split Toning:
Highlights: Hue-42, Saturation-12
Shadows: Hue-229, Saturation-8
In Photoshop CS3 Beta:
- Lab Sharpening:
-Duplicate the background layer
-Convert for Smart Filters
-Convert to Lab Color
-Select the Lightness channel
-Apply an unsharp mask with the settings (Amount: 149%, Radius: 1.1px, Threshold: 0 levels)
-Convert back to RGB. (Don’t rasterize or flatten when prompted. - Apply a radial gradient (white to black) from the center of the main subject outward to increase his sharpness while leaving the rest of the image, as is.
After:

*If you would like to contribute to the P&P Workflow, please email Jason.


